
Visualforce Page for Upload File as an Attachment OR in Chatter.
 To Upload file as an attachment or as a file using Visualforce,one must have Record Id so that the Uploaded file links with that Record.
In Order to use Bootstrap, JQuery or CSS for Designing purpose you can refer to the following link to access Script files
https://drive.google.com/open?id=0B55QW3bpdoFPYkpyWXZJOE1rZFU
Upload this Zip file as a static Resource in your Salesforce Org and use it in Visualforce Component.

<apex:component>

<apex:stylesheet value="{!URLFOR($Resource.Jquery_ToolKit,'css/vendor/bootstrap.min.css')}"/>

<apex:stylesheet value="{!URLFOR($Resource.Jquery_ToolKit,'css/app.css')}"/>

<apex:includeScript value="{!URLFOR($Resource.Jquery_ToolKit,'js/vendor/jquery.min.js')}"/>

</apex:component>
Now Use this Component in your Visualforce Page and use some Apex Input and Output Tags.
- <apex:inputText>to get File title and<apex:inputTextarea> to get File Description as Input from User .
- <apex:Input file> for choose attachment file.
- <apex:commandButton>to Save Attachment .
- Jquery function to show to name of file.
<apex:page standardStylesheets="false" sidebar="false" showHeader="false" controller="UploadFileController">

<html>
<body>

<c:UploadFile_Component />
<!-- Main Section -->
<main class="main-section">

<!-- Header Section -->
<header class="header-section">
<div class="headersection-tagline">
<div class="container">
<div class="tagline-left">Upload File as Attachment</div>
</div>
</div>
</header>
<!-- /Header Section -->

<!-- Form Section -->
<section class="inner-section">
<div class="container">
<div class="formbg-section">
<apex:form styleclass="form-horizontal" id="frm">
<div class="row">
<div class="col-md-6">
<div class="form-group">
<label class="control-label col-md-4">File Name :</label>
<div class="col-md-8">
<apex:inputText value="{!AttchName}" styleClass="form-control"/>
</div>
</div>
</div>
<div class="col-md-6">
<div class="form-group">
<div class="col-md-12">
<label class="control-label col-md-2">File: </label>
<label class="btn btn-primary" > Browse File
<apex:inputFile value="{!AttchBody}" fileName="{!AttchName}" styleclass="form-control" style="display:none" onchange="filechange(event)"/>
</label>
<span class="uploaded-file" style="overflow: hidden; display: -moz-grid;" ></span>
</div>
</div>
</div>
<div class="col-md-12">
<div class="form-group">
<label class="control-label col-md-2">Description :</label>
<div class="col-md-10">
<apex:inputTextarea styleClass="form-control" value="{!AttchDesc}"/>
</div>
</div>
</div>
<apex:messages />
<div class="col-md-12">
<div class="form-group form-action-toolbar">
<div class="col-md-8 text-left">
<apex:commandButton id="btnsave" action="{!Upload}" styleClass="btn btn-primary" value="Save File as Attachment" />
<apex:commandButton id="btnsave1" action="{!UploadChatterFile}" styleClass="btn btn-primary" value="Save File in Chatter" />
</div>
</div>
</div>
</div>
</apex:form>
</div>
</div>
</section>
<!-- /.Form Section -->

</main>
<!-- /.Main Section-->
<script>

 function filechange(e)
 {
 var fileName = e.target.files[0].name;
 $('.uploaded-file').html(fileName);
 }

</script>
</body>

</html>
</apex:page>
In order to Insert file as an Attachment Related to Record Just make the instance of Attachment Object and put the Values Like File Title, File Description, Body, Related Record Id.
In Order to Insert file as Salesforce File, first of all we need to make the Lookup field for particular Object with related list in which we want to insert file in Content Version. Please refer to the steps I have performed “I have created 2 Lookup fields in Lead and Account Objects”.
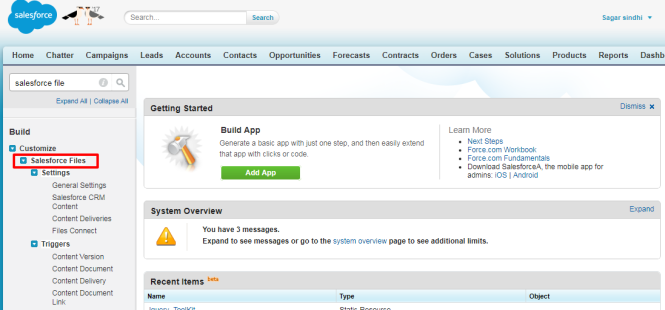
To create Lookup fields in Content Version
Salesforce Files -> Create, Modify, Delete custom fields –> New Field


After creating this Lookup Field Make Instance of Content Version and put Required Fields as we did for Attachment.
Please refer to the controller for more details.
public with sharing class UploadFileController {

Public Id PageId {get;set;}
public Blob AttchBody {get;set;}
public String AttchDesc {get;set;}
public String AttchName {get;set;}
Public Attachment attch {get;set;}

public UploadFileController(){

PageId = ApexPages.CurrentPage().getParameters().get('Id');

}

public PageReference Upload(){

attch = new Attachment(ParentId=PageId,Description=AttchDesc,Name=AttchName,Body=AttchBody);

try{
insert attch;
AttchBody = null;
AttchDesc = null;
AttchName = null;
}
catch(Exception ex){
ApexPages.addMessage(new ApexPages.message(ApexPages.severity.ERROR,ex.getlineNumber()+' '+ex.getMessage()));
return null;

}
ApexPages.addMessage(new ApexPages.message(ApexPages.severity.INFO,'Attachment uploaded successfully'));
return null;
}

public PageReference UploadChatterFile() {


ContentWorkspace cw =[SELECT Id FROM ContentWorkspace WHERE DeveloperName = 'Test_Workspace'];

ContentVersion v = new ContentVersion();
v.versionData = AttchBody;
v.title = AttchName;
v.FirstPublishLocationId = cw.Id;
v.pathOnClient = AttchName;

If(PageId.getSObjectType() == Account.sObjectType){
v.Account__c = PageId;
}
If(PageId.getSObjectType() == Lead.sObjectType){
v.Lead__c = PageId;
}

v.Description = AttchDesc;

try{
insert v;
AttchBody = null;
AttchDesc = null;
AttchName = null;
}
catch(Exception ex){
ApexPages.addMessage(new ApexPages.message(ApexPages.severity.ERROR,ex.getlineNumber()+' '+ex.getMessage()));
return null;
}

ApexPages.addMessage(new ApexPages.message(ApexPages.severity.INFO,'Attachment uploaded successfully in Chatter'));
return null;
}
}
Hope you find this helpful, in case of any queries/concerns, please post a reply or drop an email to me at sfdcsagarsindhi@gmail.com .

[…] Previous Post, We Saw How to Upload File in Salesforce Through Visualforce […]
LikeLike
ContentVersion is a standard field, how come it has Account__C field on line 46
LikeLike
Sagar you can create the custom field in content version object like i did.
please look in the screenshots given in the artical.
LikeLike